Running an example#
OpenFDEM is operated through a command-line interface. Before running a model,
make sure that OpenFDEM has been installed (see the Downloads page) and that you have prepared an input file with the
.of extension (see the Examples page). Once
everything is ready, you can run your model using one of the following methods.
Method 1: Running OpenFDEM from the Command Console#
Navigate to the folder containing your input file. Open the Windows command
console by pressing Win + R, typing cmd, and pressing Enter.
The general command format is:
C:\[The path where OpenFDEM is installed]\openfdem.exe -in E:\[The path of your input file]\[runfilename].of
If the command console is opened directly in the folder containing your
.of file, the path of the input file can be omitted:
C:\[The path where OpenFDEM is installed]\openfdem.exe -in [runfilename].of
Furthermore, after installing OpenFDEM, the installation path is automatically
added to the system PATH environment variable. Therefore, the path of the
executable file does not need to be specified, and the command can be further
simplified as:
openfdem.exe -in [runfilename].of
The keyword -in can also be omitted:
openfdem.exe [runfilename].of
After executing the command, the Gmsh interface will appear. First, check the geometry and close Gmsh to continue. Then, the mesh will be displayed. Check the mesh quality and close Gmsh to start the simulation.
During the simulation, the running process can be interrupted by pressing
Enter. Pressing Enter again will resume the simulation. The calculation will
terminate automatically when the specified simulation steps are completed or
when the OpenFDEM interface is manually closed. The simulation results will be
saved in the output folder specified in the corresponding .of file.

Step 1. Input the command in the console.#
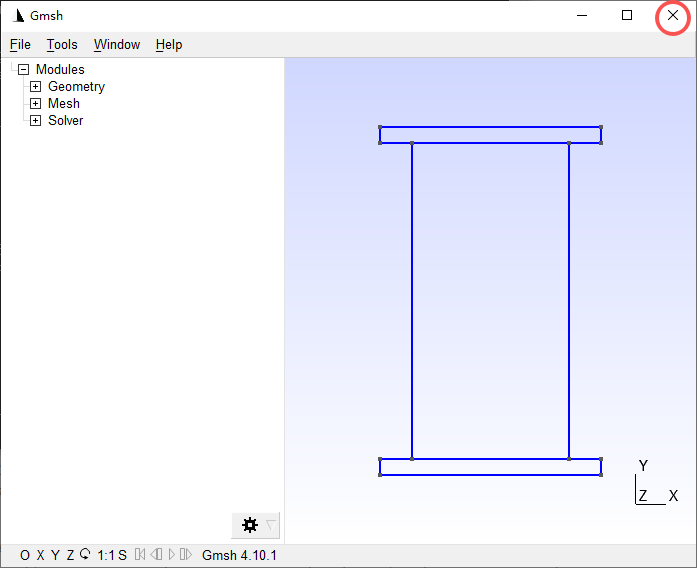
Step 2. Check the geometry and close Gmsh to continue.#
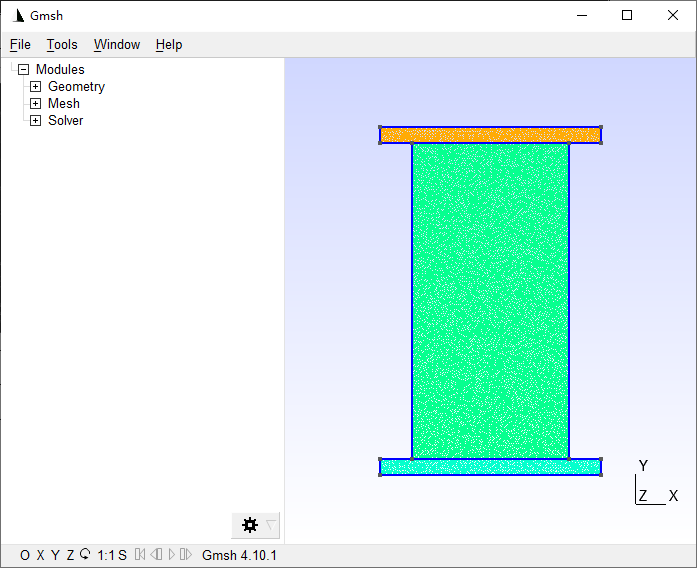
Step 3. Check the mesh and close Gmsh to continue.#
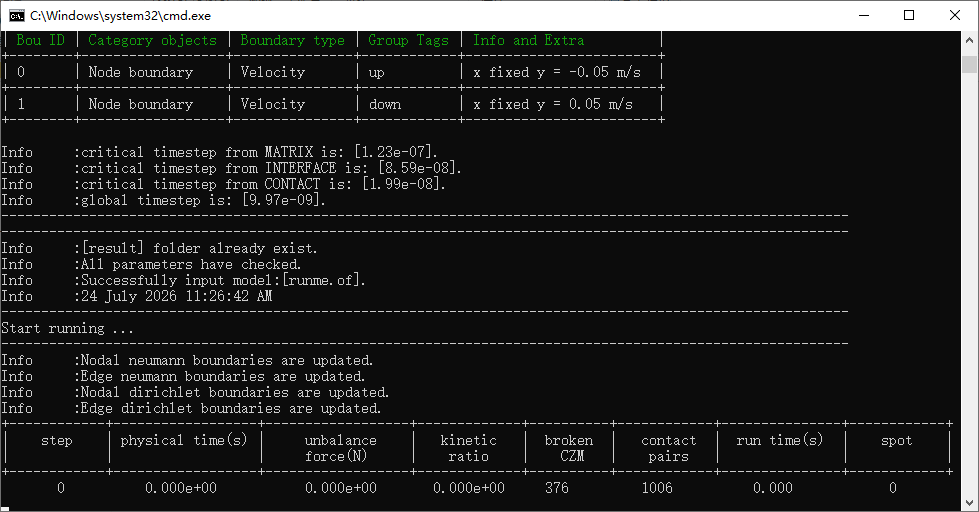
Step 4. Start running and wait until the simulation finishes.#
Method 2: Running OpenFDEM Using a Shortcut#
A shortcut of OpenFDEM.exe can be created from the installation directory.
Copy this shortcut into the folder containing your .of input file.
Then, simply drag and drop the .of file onto the shortcut, and OpenFDEM
will automatically start the simulation.
Alternatively, instead of navigating to the OpenFDEM installation directory, you can directly run OpenFDEM through this shortcut using the same commands described in Method 1.
Method 3: Running OpenFDEM Using a Batch File#
On Windows systems, a .bat file can be used to quickly execute an OpenFDEM
model. A template batch file named runOpenFDEM.bat is provided in the
OpenFDEM installation directory. To use it:
Copy
runOpenFDEM.batinto the folder containing your.ofinput file.Open the batch file using a text editor.
Modify the OpenFDEM executable path (line 4) and the input file name (line 7).
Save the file and double-click the
.batfile to run the model automatically.
Creating Your Own Examples#
To create your own OpenFDEM examples, you can directly copy an existing example
folder and modify the corresponding .of and .bat files.
Each .of file contains detailed comments explaining the function of
different parameters and commands. Users can enable or disable specific
functions by adding or removing the corresponding comment symbols.